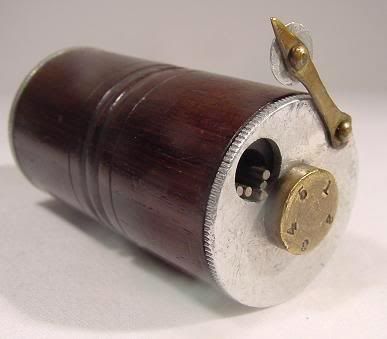
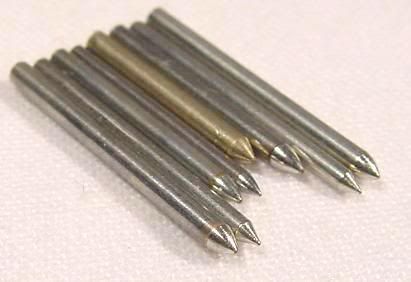
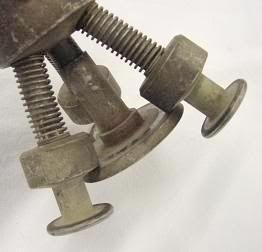
823. These are piano action center pins:
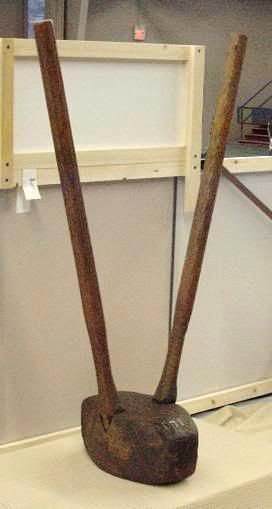
824. Two handled hammer, these are called "Johnnys" and were used in the early railroad industry to knock around the ties and rails. They were also used for other purposes, including chain making in the Black Country in Great Britain.
A photo of two men holding a similar hammer can be seen here (same link as in the comments in the original post).
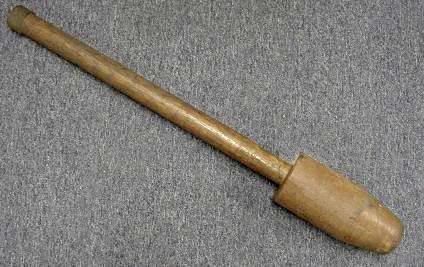
825. According to the owner, it's a Bell System conduit flaring tool, when joining two pieces of lead conduit this tool was used to widen one of the ends.
Though someone who has worked with it describes it differently:
"Back in the day telephone cable came with a lead sheath or outer skin. Even as late as the late 1980's we'd get lead sheathed cable in for locations where the environment was too caustic for plastic sheathing. The last large lead sheathed cable I worked on was in Plano Texas. It was brought in between two manholes that had serious fumes from a leaking gasoline station tank.
Cable splicing back in the day was a skilled trade. Depending upon the telco you could figure five to six years to go from being an apprentice to a journeyman. The wires were connected together by stripping off the insulation off of the individual conductor and then twisting them together.
The closures over the splices were also lead. That way a lead closure could be soldered to the lead sheath for a hermetically sealed splice. The lead for the closures would come into the supply department in six foot long lengths. These lengths would come in all diameters.
Lead is soft and will deform easily. The item you're showing was used to help reshape the lead tube back into a round shape because most of the time the lead cylinder was deformed by the time it got to the job site.
Lead work was interesting and I really enjoyed it. I got into the business in the late sixties as it was being replaced by plastic sheath and mechanical closures. But occasionally a situation would come up where we had to go into an old lead closure and close it back up or the lead closure was the only thing that would work.
Skill wise the only thing I can compare it to would be blacksmithing. There was a lot of hammer work with a wood tool called a lead dresser. What we'd do is find a sleeve of lead of the proper diameter. Using the lead dresser we would hammer down the ends to where they'd fit the size of the lead sheath. If it was new cable we'd prepare the sleeve and then slide if over the cable and off to one side before starting the splicing procedure. If the splice was already done we'd form the sleeve and then split it open so it could fit over the splice. We'd close it back up and the solder it all up.
My first welding was soldering the telco lead. It wasn't easy and I believe that's what made it so much fun.
When it was done right it was beautiful, think perfect tig on aluminum without the beads. When it was not done right, well, remember your first welds?"
826. This was marked "corn grinder", but is actually a cutter for straw, hay, and corn stalks to be used for animal feed.
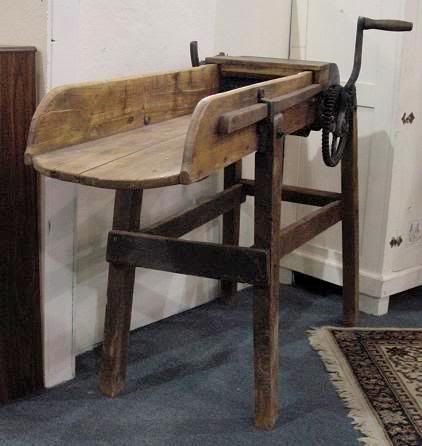
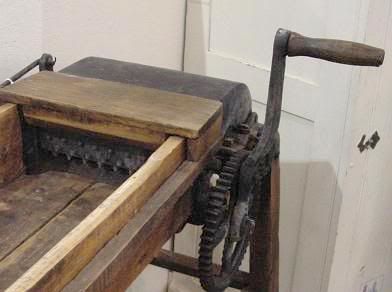
Lifting the metal cover exposes the blade, which is indicated by the arrow. Turning the handle pulls in the hay and rotates the blade:

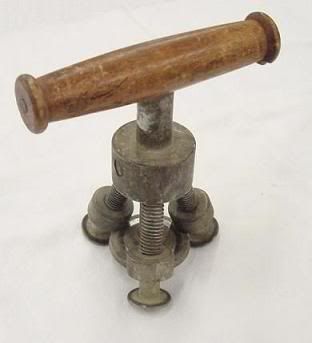
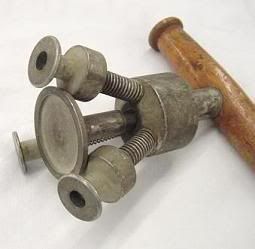
827. Tool for "crimping the edges of sheet metal caps upon the flanged mouths of can spouts, and for other similar purposes," patent number 502339.
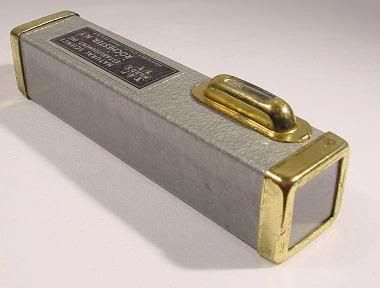
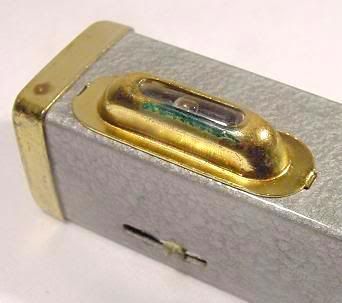
828. Hand sighting level, text on it reads: "Ward's Natural Science Establishment, Inc., Rochester N.Y.", and "Swift Instruments, Inc., Boston 25, Mass."
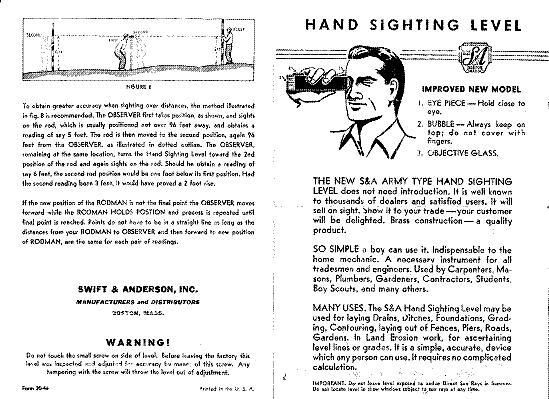
Thanks to Leon for sending in these instructions:
Click here to see a larger image.
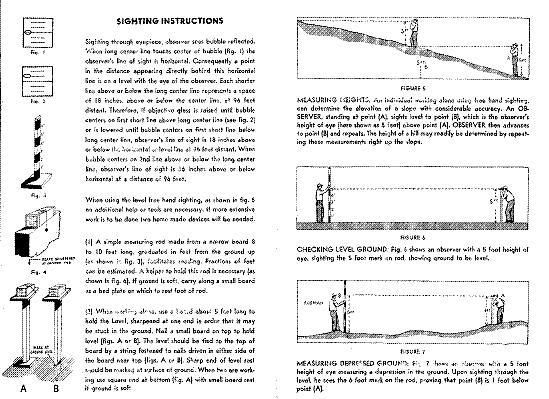
Larger image
Last week's set is seen below, click here to view the entire post:
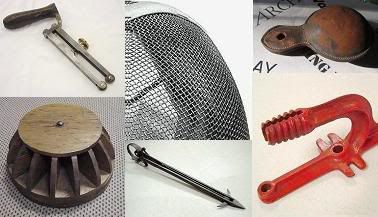


824. Two handled hammer, these are called "Johnnys" and were used in the early railroad industry to knock around the ties and rails. They were also used for other purposes, including chain making in the Black Country in Great Britain.

A photo of two men holding a similar hammer can be seen here (same link as in the comments in the original post).
825. According to the owner, it's a Bell System conduit flaring tool, when joining two pieces of lead conduit this tool was used to widen one of the ends.

Though someone who has worked with it describes it differently:
"Back in the day telephone cable came with a lead sheath or outer skin. Even as late as the late 1980's we'd get lead sheathed cable in for locations where the environment was too caustic for plastic sheathing. The last large lead sheathed cable I worked on was in Plano Texas. It was brought in between two manholes that had serious fumes from a leaking gasoline station tank.
Cable splicing back in the day was a skilled trade. Depending upon the telco you could figure five to six years to go from being an apprentice to a journeyman. The wires were connected together by stripping off the insulation off of the individual conductor and then twisting them together.
The closures over the splices were also lead. That way a lead closure could be soldered to the lead sheath for a hermetically sealed splice. The lead for the closures would come into the supply department in six foot long lengths. These lengths would come in all diameters.
Lead is soft and will deform easily. The item you're showing was used to help reshape the lead tube back into a round shape because most of the time the lead cylinder was deformed by the time it got to the job site.
Lead work was interesting and I really enjoyed it. I got into the business in the late sixties as it was being replaced by plastic sheath and mechanical closures. But occasionally a situation would come up where we had to go into an old lead closure and close it back up or the lead closure was the only thing that would work.
Skill wise the only thing I can compare it to would be blacksmithing. There was a lot of hammer work with a wood tool called a lead dresser. What we'd do is find a sleeve of lead of the proper diameter. Using the lead dresser we would hammer down the ends to where they'd fit the size of the lead sheath. If it was new cable we'd prepare the sleeve and then slide if over the cable and off to one side before starting the splicing procedure. If the splice was already done we'd form the sleeve and then split it open so it could fit over the splice. We'd close it back up and the solder it all up.
My first welding was soldering the telco lead. It wasn't easy and I believe that's what made it so much fun.
When it was done right it was beautiful, think perfect tig on aluminum without the beads. When it was not done right, well, remember your first welds?"
826. This was marked "corn grinder", but is actually a cutter for straw, hay, and corn stalks to be used for animal feed.


Lifting the metal cover exposes the blade, which is indicated by the arrow. Turning the handle pulls in the hay and rotates the blade:

827. Tool for "crimping the edges of sheet metal caps upon the flanged mouths of can spouts, and for other similar purposes," patent number 502339.


828. Hand sighting level, text on it reads: "Ward's Natural Science Establishment, Inc., Rochester N.Y.", and "Swift Instruments, Inc., Boston 25, Mass."


Thanks to Leon for sending in these instructions:

Click here to see a larger image.

Larger image
Last week's set is seen below, click here to view the entire post:


3 Comments:
phonograph needles?
By Anonymous, at Saturday, November 18, 2006 6:53:00 AM
I believe the "corn grinder" was used to grind the dried stalks into feed.
By Canem, at Saturday, November 18, 2006 6:10:00 PM
>phonograph needles?
I'll see what I can find on that idea.
>I believe the "corn grinder" was used to grind the dried stalks into feed.
Thanks, this is correct, I just changed my answer.
By Rob H., at Sunday, November 19, 2006 2:31:00 PM
Post a Comment
<< Home